How to Raise a Support Ticket
Any logged-in user (student, instructor, organization) can raise a ticket. There are two kinds: Course Support (answered by the course instructor) and Platform Support (routed to an admin department).
Student
Instructor
Organization
1. Raise a Ticket
- Log in → click your avatar (top-right) → Dashboard.
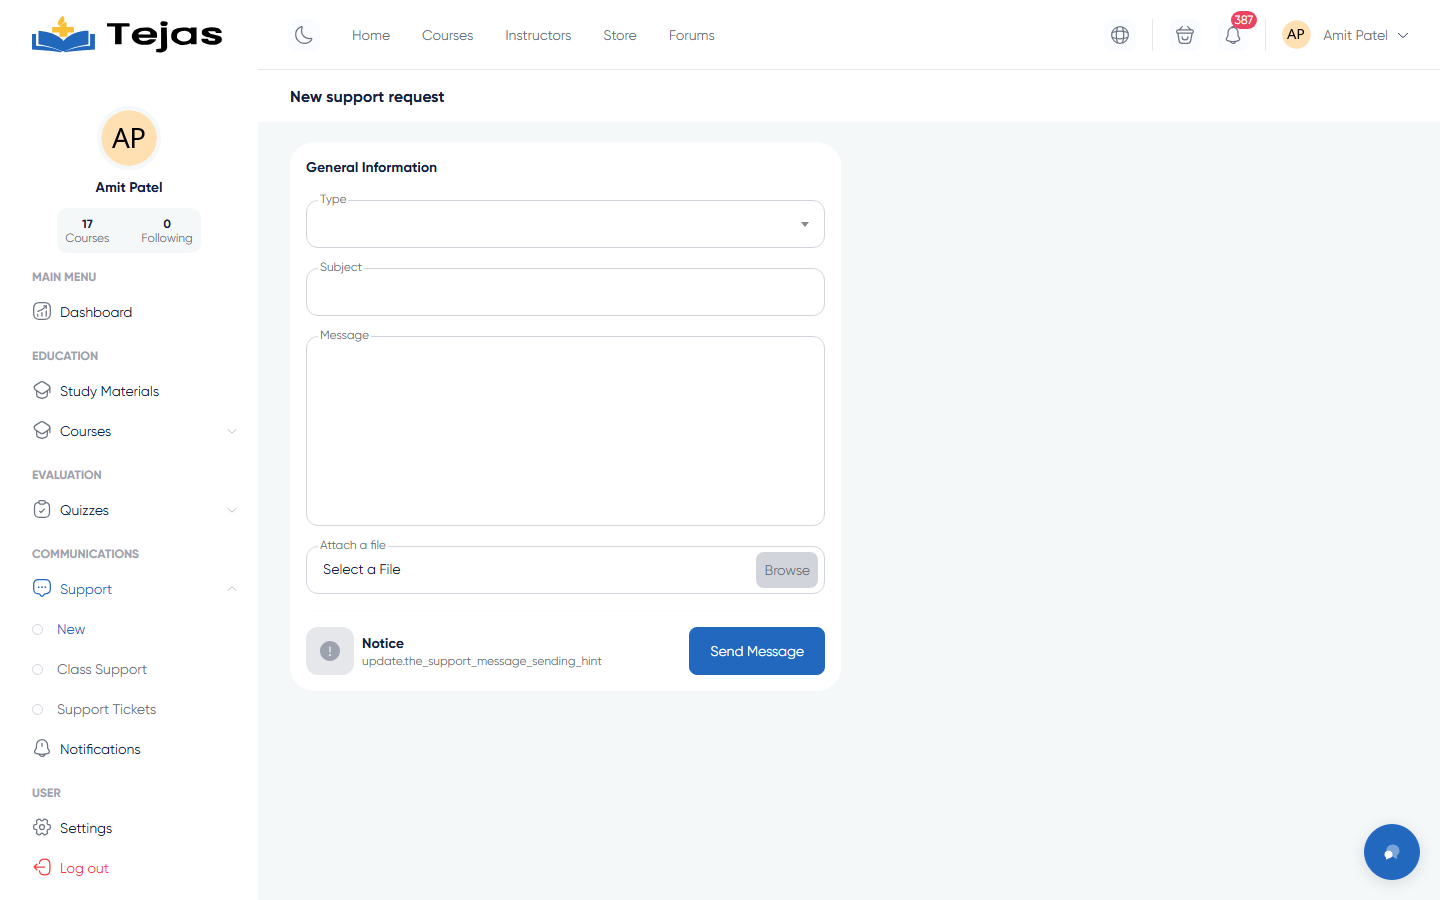
- In the left sidebar click Support to expand it, then click New. (While studying, Course Tools → Get Support on the learning page opens the same form.)
- Choose the Type:
- Course support — a Course dropdown appears; pick the purchased course your question is about.
- Platform support — a Department dropdown appears (e.g. Finance, Technical); pick the closest match.
- Type a short Subject.
- Write your Message with as much detail as possible.
- Optionally click Browse next to Attach a File to add a screenshot or document.
- Click Send Message. Your ticket is created with status Open and the instructor/support team is notified.
2. Check Replies and Continue the Conversation
For course tickets:
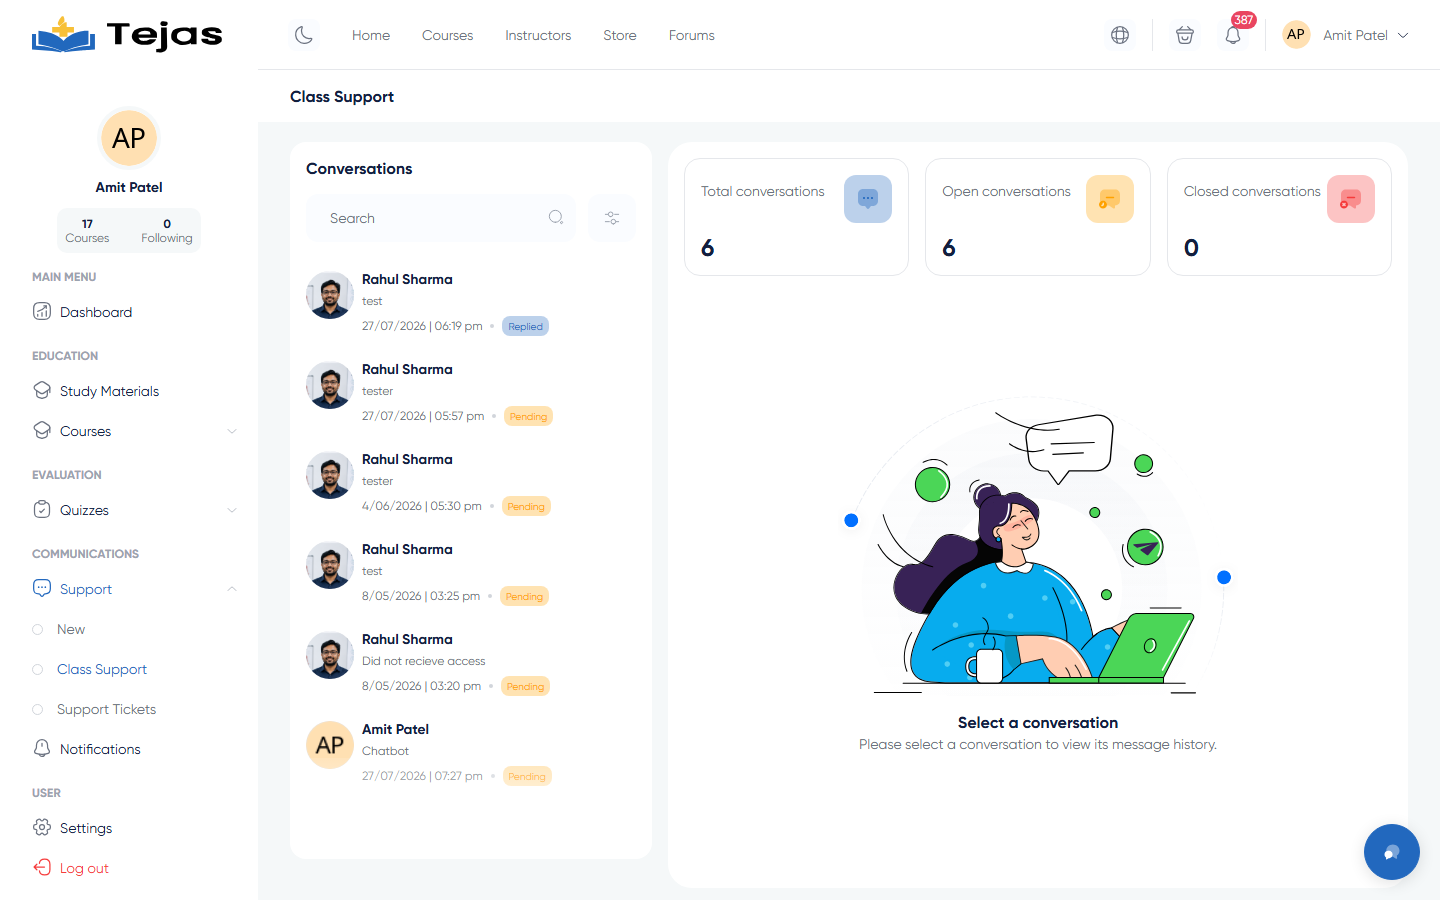
- Sidebar → Support → Class Support.
- Click the conversation row you want to open.
- Type your reply in the message box (attachments supported) and send.
- When your problem is solved, click Close on the thread.
For platform tickets:
- Sidebar → Support → Support Tickets.
- Click your ticket to open the thread, read the answer, and reply if needed.
3. Answer Tickets — Instructors & Organizations
- Log in → avatar → Dashboard.
- Sidebar → Support → Class Support — this lists tickets you raised and tickets students raised against your courses.
- Use the filters (student, course, status, date) to find a ticket, click it, reply, and Close it when resolved.
4. Manage Everything — Admin
- Log in to /admin.
- Sidebar → CRM → Support: open List to answer/close/delete any ticket, or New ticket to start one.
- Open Departments to add/edit the departments users see in the "Platform support" dropdown.