How to Buy a Course (Cart & Checkout)
This walkthrough covers paid courses, free courses, coupons, and paying from your wallet balance.
Student
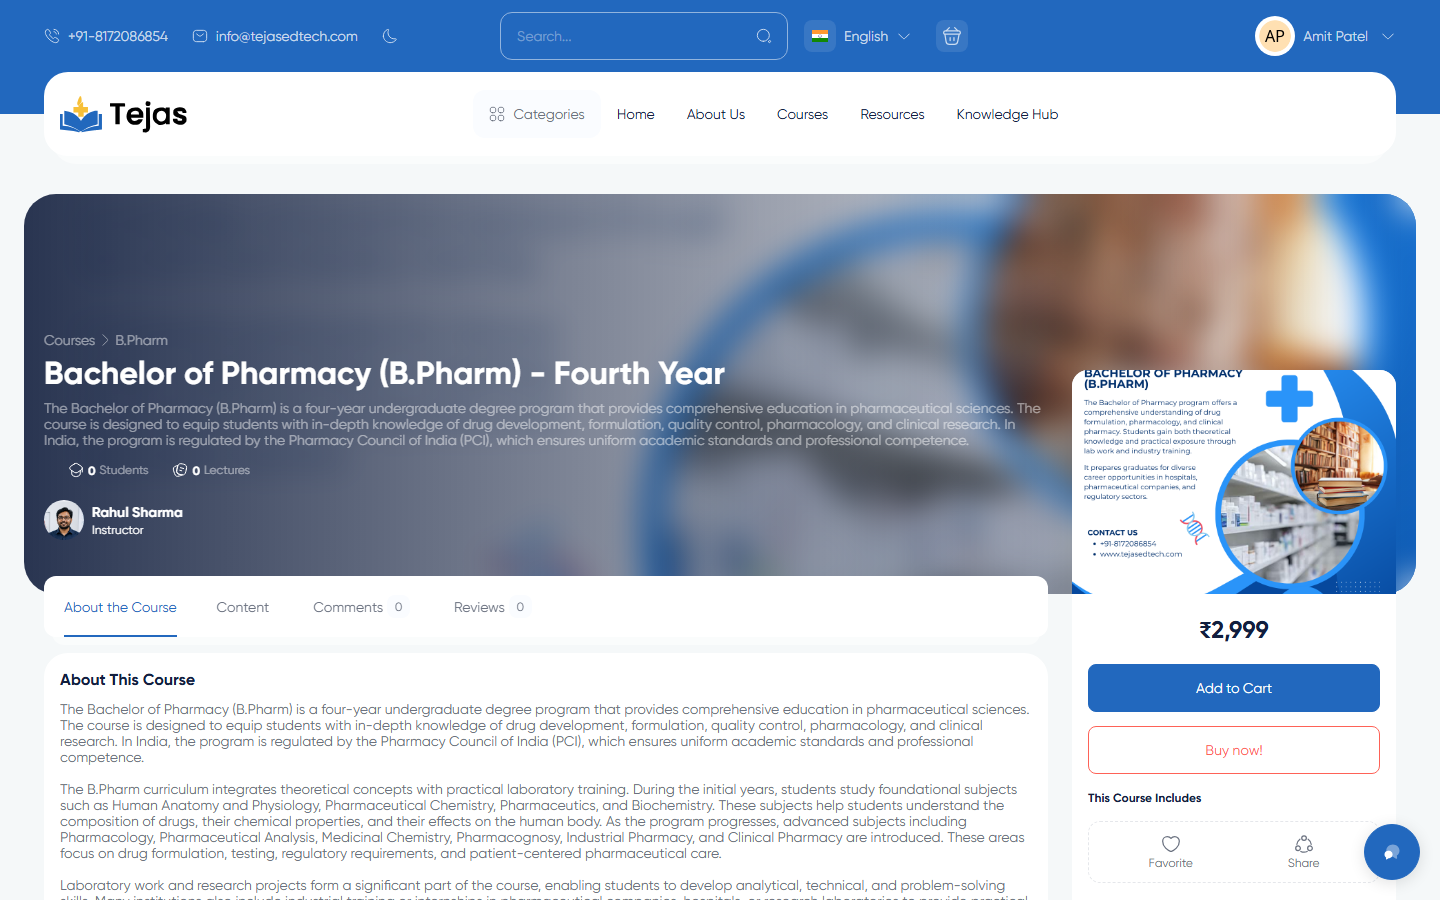
1. Add the Course to Your Cart
- Open the course page (via Courses, Categories, or search).
- In the right-hand price card click Add to Cart. A toast confirms "Added to Cart!" and a drawer slides out showing your cart items and subtotal.
- Click View Cart in the drawer (or the cart icon in the top bar) to open the Cart page.
Free course? The button reads Enroll on webinar instead — one click enrolls you immediately, no cart or payment involved.
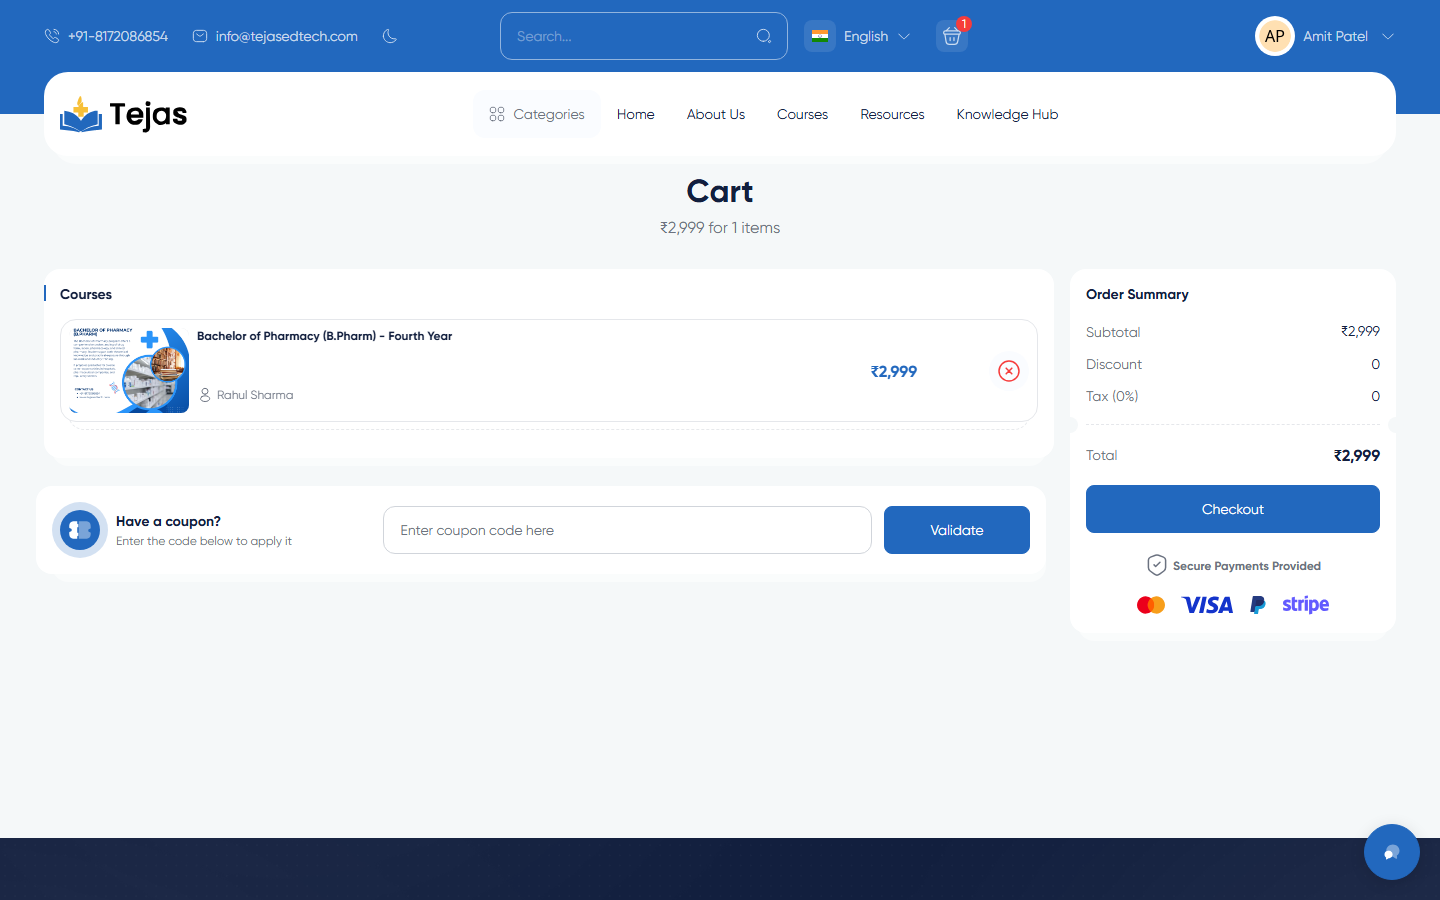
2. Review the Cart and Apply a Coupon
- Check your items — remove any with the trash icon.
- Have a discount code? Type it in the "Have a coupon?" box and click Validate. The Order Summary updates with the discount; an invalid code shows "Invalid coupon".
- Review the Order Summary (Subtotal, Discount, Tax, Total) and click Checkout.
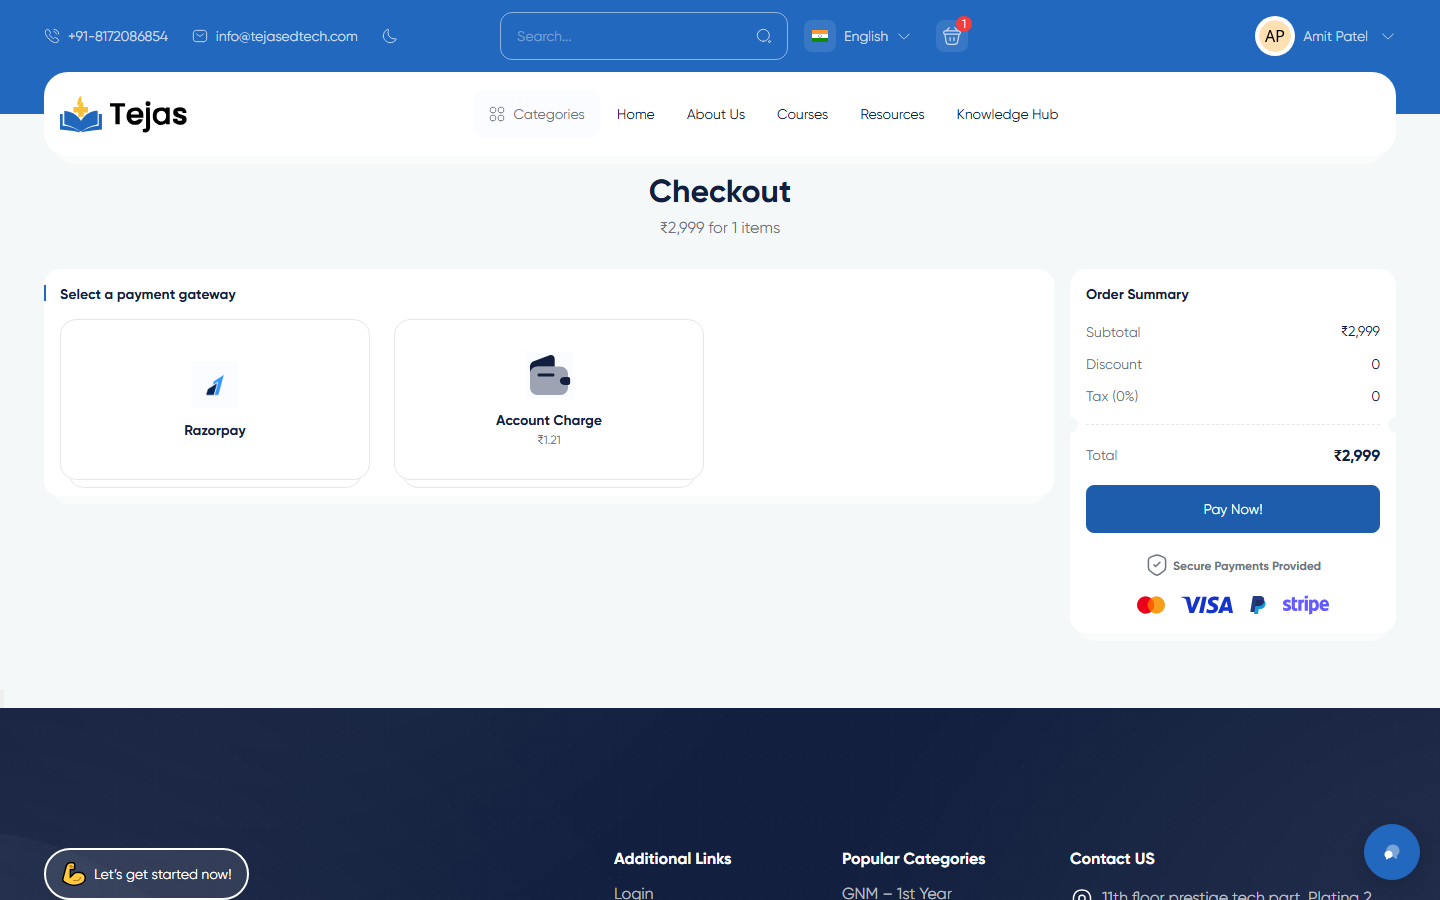
3. Pay
- On the Checkout page, select a payment gateway tile (e.g. Razorpay) — or Account Charge to pay from your wallet balance (disabled when the balance is lower than the total).
- Click Pay Now! and complete the payment on the gateway page.
- You return to a "Successful payment" page — click My Panel.
4. Start Learning
- Avatar → Dashboard → sidebar Courses → My Purchases — your new course is listed.
- Click Continue (or open the course page and click Go to learning page) to start the lessons.
5. Paying by Bank Transfer (Offline Payment)
Bank/offline payment works by topping up your wallet first, then paying with Account Charge:
- Go to /panel/financial/account ("Charge Account").
- Under Select a payment method choose the Offline tile — the platform's bank accounts are displayed.
- Transfer the money from your bank, then fill in: Amount, Account (which bank you paid into), Referral code, Date & time of the transfer, and Attach the payment photo (receipt image, max 10 MB).
- Click Submit. Your request goes to the admin for approval; you're notified when it's accepted.
- Once approved, the amount appears as your Account Charge balance — go through checkout again and pick the Account Charge tile.
Other purchase options you may see on a course page depending on configuration: Buy Now (skips the cart), Buy with points (reward points), Pay with installments, and Subscribe (uses your active subscription plan — see the Account Settings & Plans guide).