Instructor: Create a Course from Scratch
The course builder is an 8-step wizard. You can leave and come back any time — use Save as draft and continue later from Courses → My Courses.
Instructor
Organization
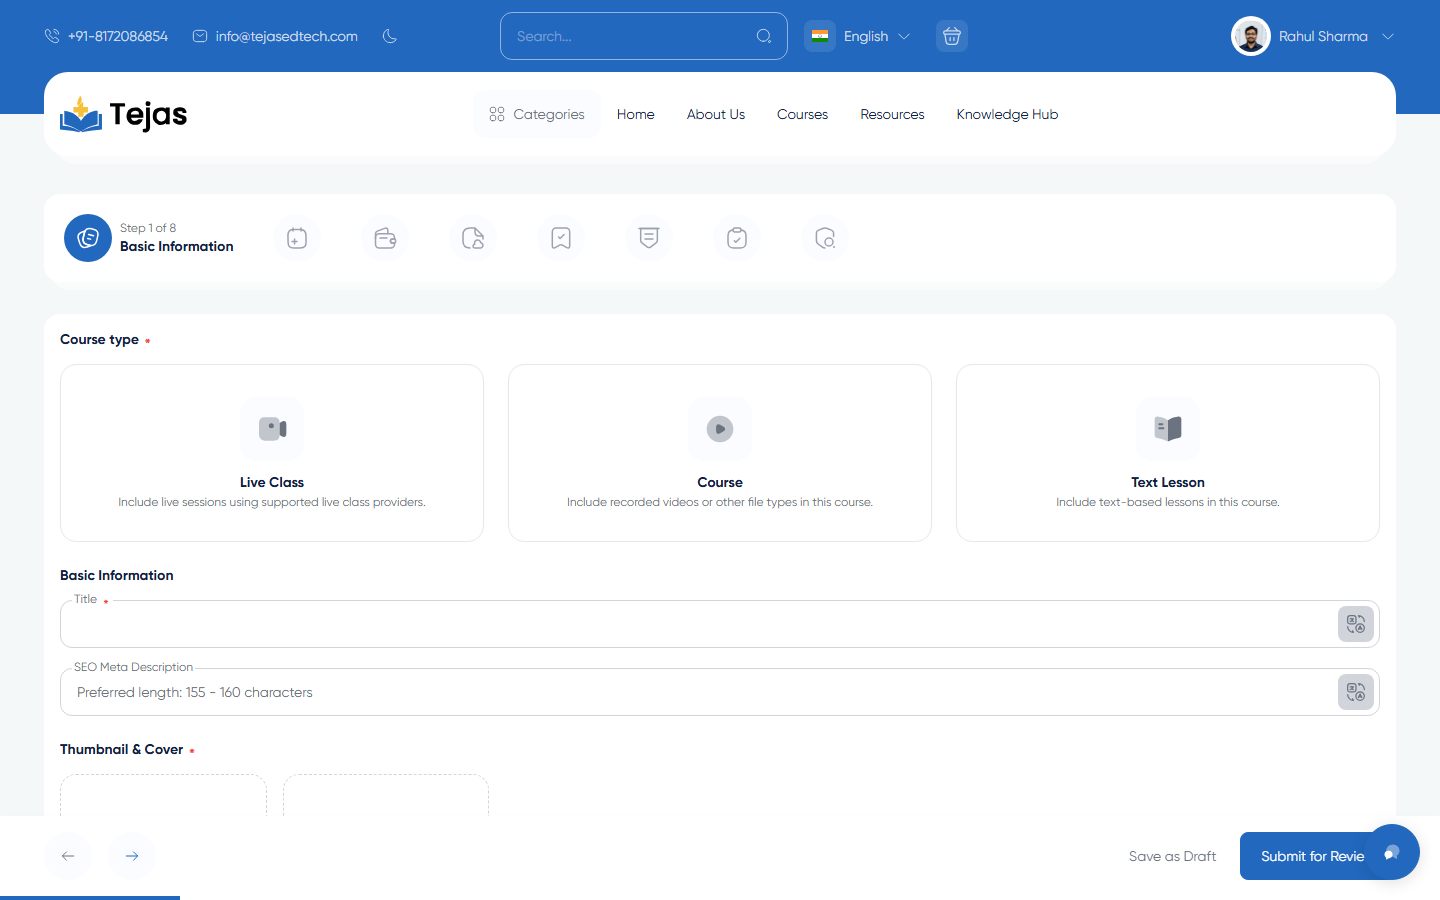
Step 1 — Basic Information
- Log in → avatar → Dashboard → sidebar Courses → New.
- Pick the Course type: Live Class (scheduled live sessions), Course (recorded videos/files), or Text Lesson.
- Enter the Title and an SEO Meta Description (150–160 characters).
- Upload the Thumbnail & Cover images, optionally a course icon and a Demo video.
- Write the Course summary and full Description, then click the → arrow to save and continue.
Steps 2–3 — Details and Pricing
- Step 2 — Extra Information: choose the Category (required) and any category filters; set Capacity, Start date, Duration, Timezone; switch on options you want — Course forum, Support, Include certificate (needed for completion certificates), Downloadable, Partner instructor; add Tags.
- Step 3 — Pricing: set the Price (enter 0 for a free course), optional Access days (how long buyers keep access), Include subscribe if subscription plans may redeem it, and any pricing plans.
Step 4 — Content
- Click New chapter to create sections (e.g. "Unit 1 — Anatomy").
- Inside each chapter add items: Files (videos/PDFs), Text lessons, Assignments, live Sessions (live classes only), and link Quizzes.
- Drag items to reorder them.
Steps 5–7 — Prerequisites, FAQ, Quiz & Certificate
- Step 5 — Prerequisites: link earlier courses students should finish first.
- Step 6 — FAQ: add question/answer rows shown on the course page.
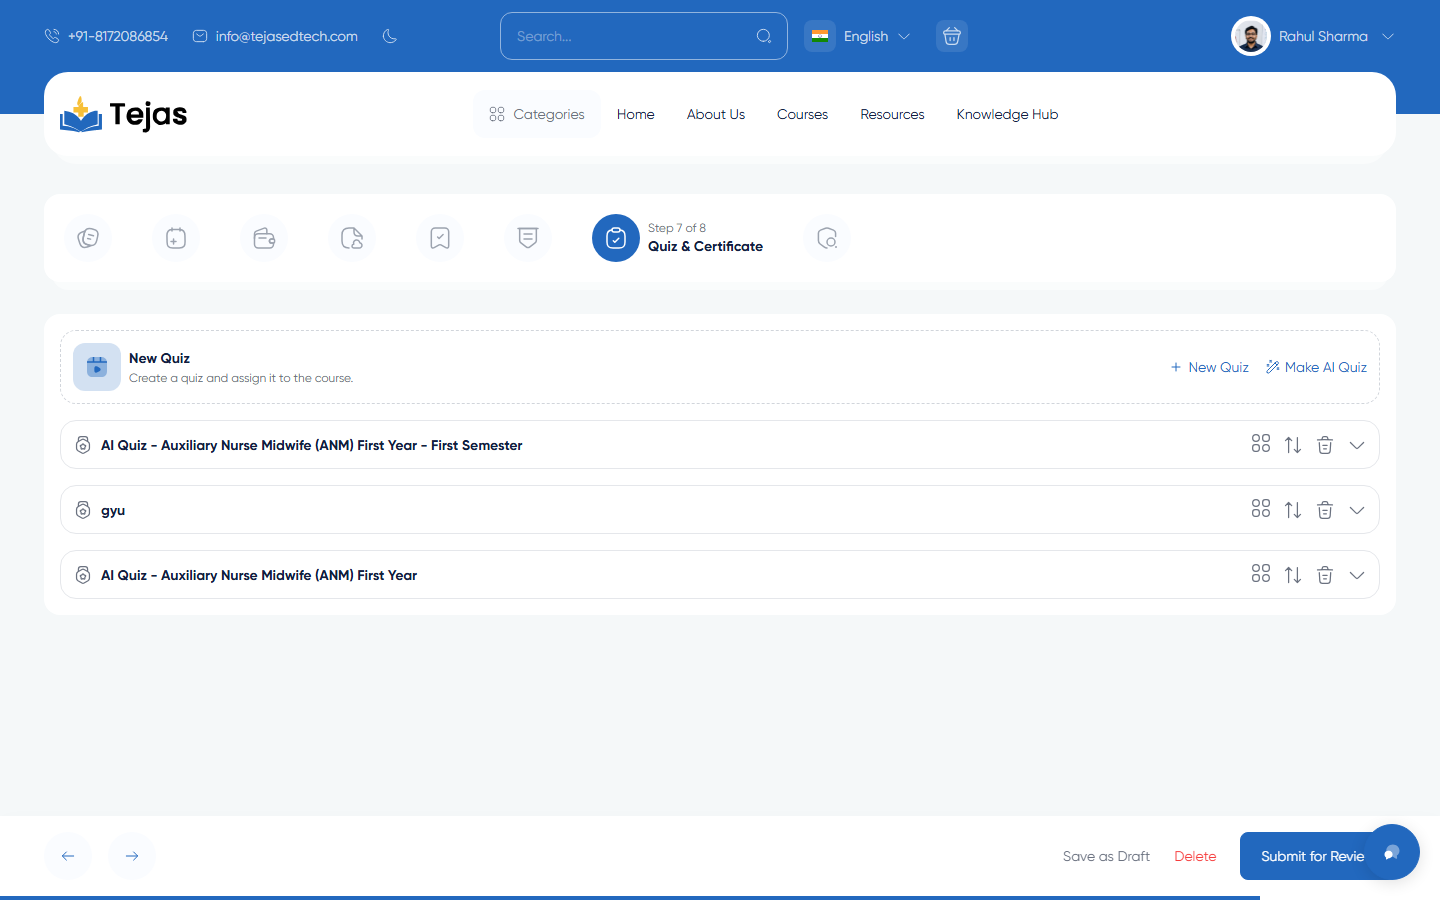
- Step 7 — Quiz & Certificate: click New Quiz to build one manually or Make AI Quiz for an instant 5-question quiz (see the quiz guide).
Step 8 — Submit for Review
- Write an optional Message to the reviewer.
- Switch on Agree rules (required — without it the course stays a draft).
- Click Submit for Review. The course status becomes Pending and the admin is notified.
- The admin approves it under Admin → Classes (Approve/Unpublish) — once approved, your course is live in the catalogue.
Note: if the admin has enabled direct publication, step 8 is skipped and the button reads Publish — your course goes live immediately. Editing a published course sends it back to Pending for re-review.