Organization: Email Template, Importing Students & Sending Emails
Everything below starts from the organization panel: log in with your organization account → click your avatar (top-right) → Dashboard. The sidebar shows a Students menu with New, List, and Email Templates.
Organization
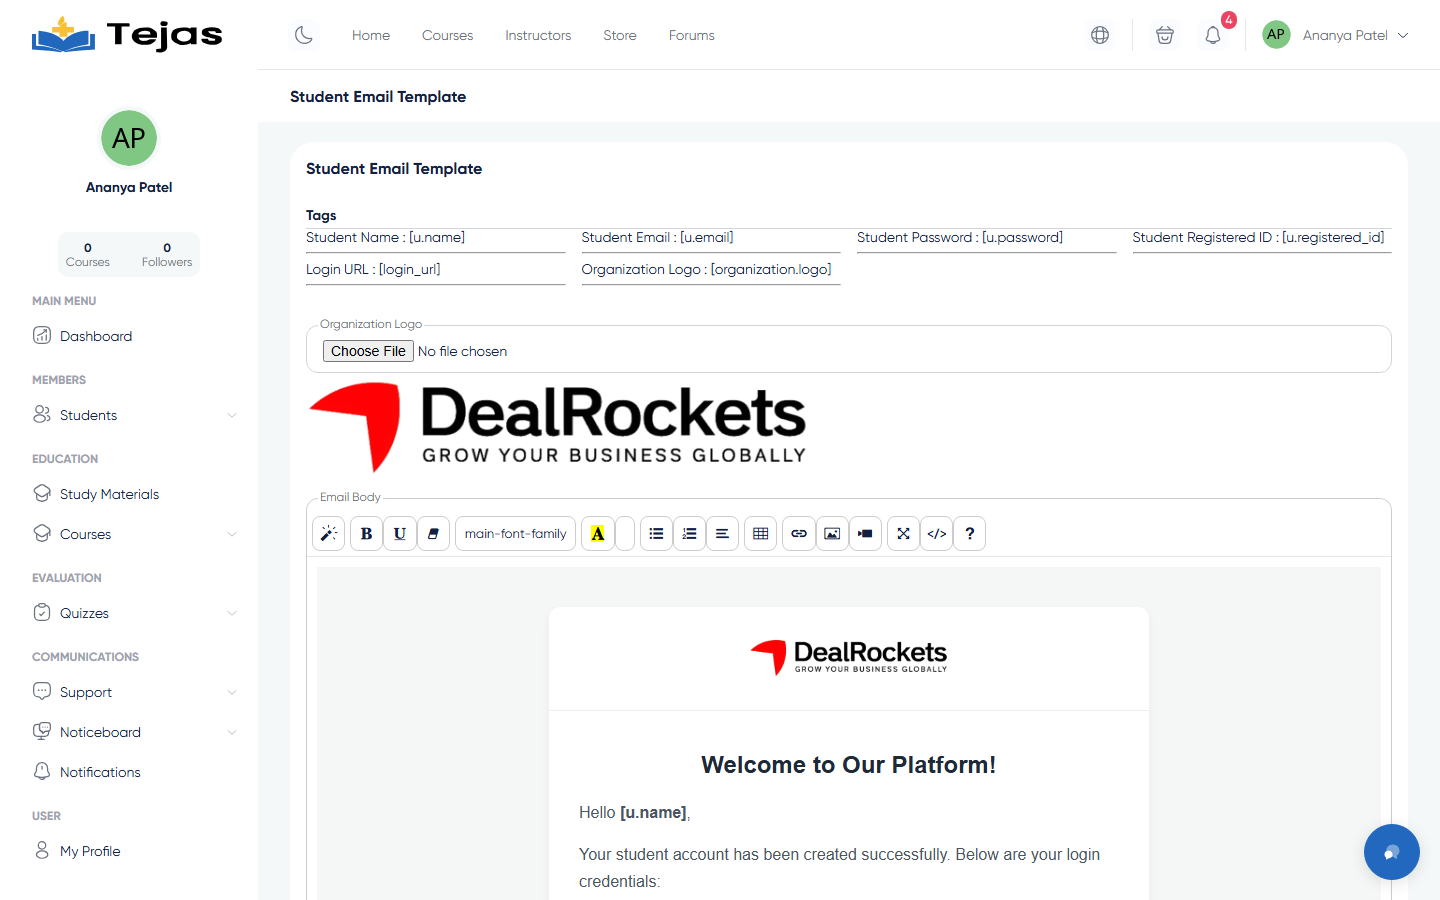
1. Customize the Student Email Template
- Sidebar → Students → Email Templates.
- Look at the Tags row at the top — these placeholders are replaced per student when the email is sent: [u.name] [u.email] [u.password] [u.registered_id] [login_url] [organization.logo]
- Click Choose File under Organization Logo and upload your logo (jpg/png/gif/svg, max 2 MB) — it replaces [organization.logo] in the email.
- Edit the Email Body in the rich-text editor — write your welcome text and place the tags where the student's details should appear.
- Click Save Template.
2. Import Students from Excel
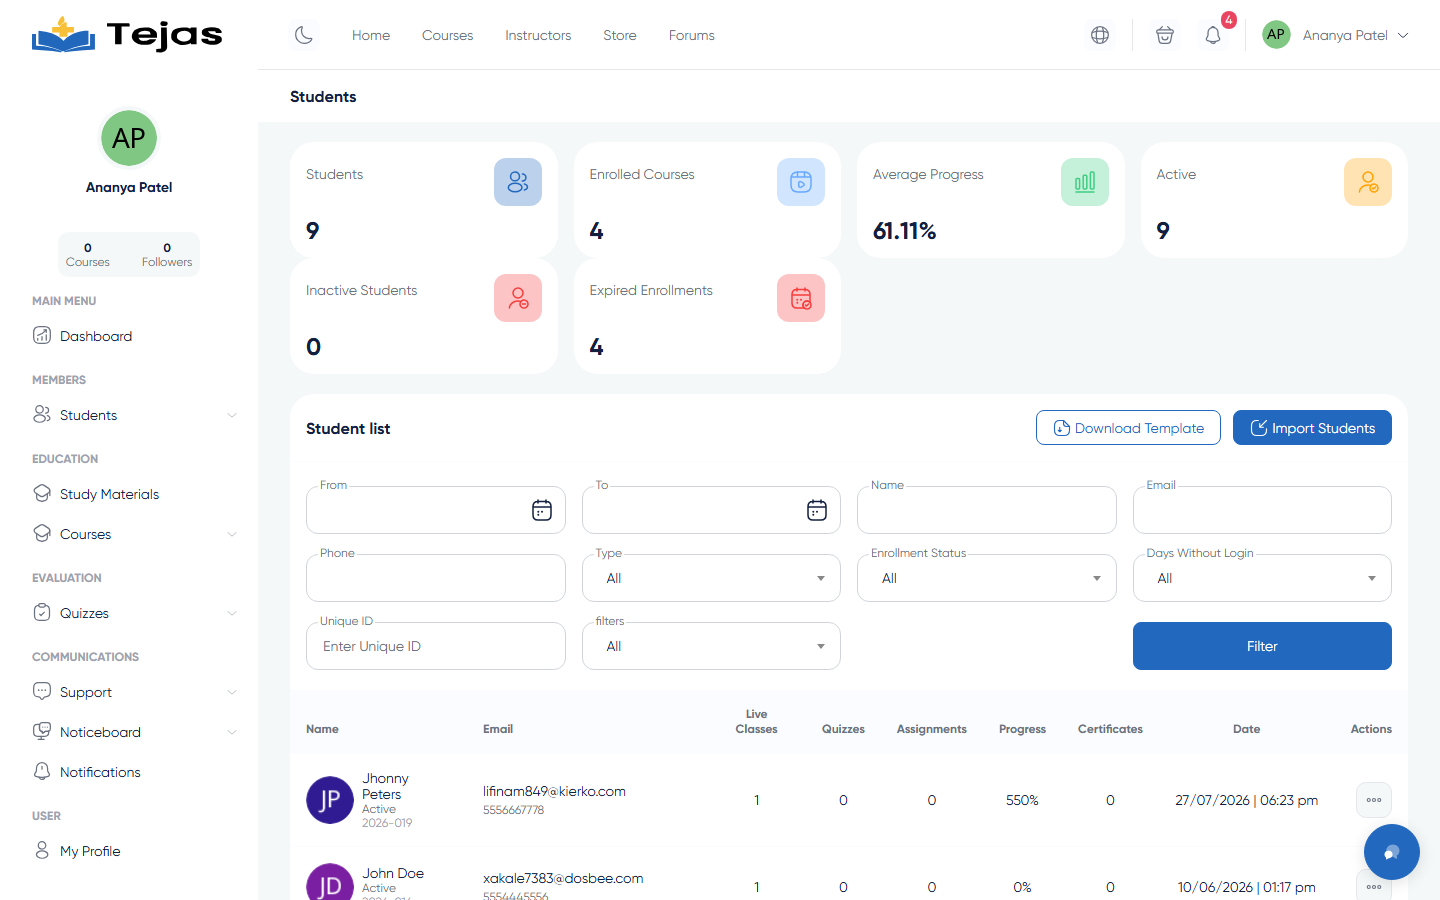
- Sidebar → Students → List.
- Click Download Template (top-right) — you get student_import_template.xlsx.
- Open the file and fill one row per student: Full Name (required), Email, Mobile, Year (required, dropdown), Courses (required — pick from the dropdown; separate several with commas), Institution, User Group, Status, Address, Bio.
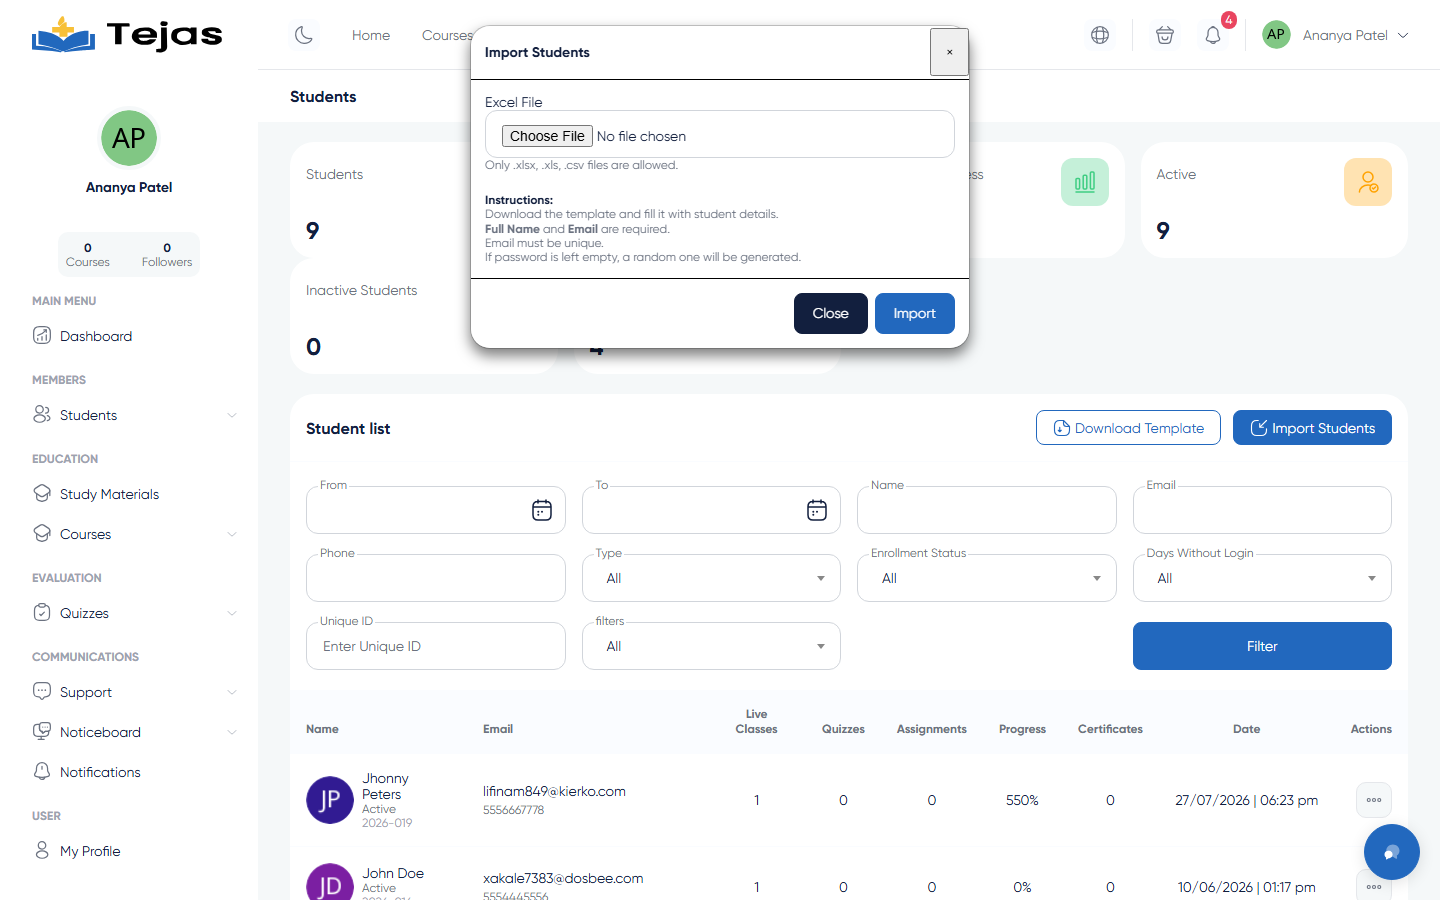
- Back on the list page, click Import Students.
- In the modal click Choose File, select your filled sheet (.xlsx/.xls/.csv), and click Import.
- A green toast confirms "N students imported successfully". If some rows were invalid, an error list shows exactly which row and why — fix those rows and import again.
To add one student manually instead: Students → New, fill the form, Save. If email/password are left blank they're generated automatically.
3. Send the Credentials Email to Students
First, always send a test:
- Sidebar → Students → Email Templates, scroll below the editor.
- In Send Test Email, enter your own email address and any sample password.
- Click Send Test Email and check your inbox to verify the layout and logo.
Then send to your students:
- On the same page click Send to All Students.
- Read the confirmation carefully before accepting: ⚠ this regenerates every student's password and emails each one their new credentials. Students must log in with the new password from the email.
- A toast confirms "N student email(s) queued successfully" — delivery runs in the background.
Message one student only: Students → List → open the row's ⋮ actions menu → Send Message → write and send an in-platform notification.
4. Track a Student
- Sidebar → Students → List.
- Open the student row's ⋮ menu → Statistics — courses, quiz results, assignments and progress for that student.
Scope note: the organization panel customizes only this student-credentials email. Certificate templates and platform notification templates are managed by the admin (Admin → Certificates → Templates).